Through this post I will share you how to take screenshots on Android. This will be divided into two parts, here there are:
First step;
For devices running Android 2.2 Froyo you just need to press the home button and the back touch button simultaneously.
Once you have done, a message will appear on the screen that reads "Screen captured. Saved as image files." Access your captured screen from My Files > ScreenCapture folder.
If the above does not help you to take screenshots on Android, try the second way. This method does not require you to rooting your device.
Second step;
- You should download, install, and configure Android SDK in your computer.
- Don't forget to Enable USB Debugging mode in your Android device. Go to Menu -> Settings -> Applications -> Development. In the Development window, tap to enable USB Debugging.
- Connect your PC to your Android device via USB cable. When you see options to setting USB, please don’t select any option. Just ignore it.
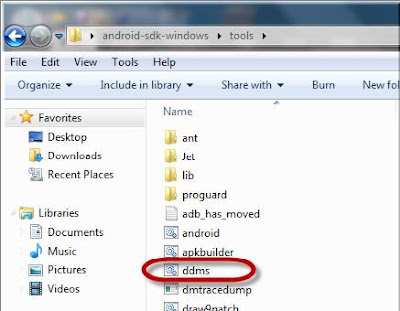
- Go to the “tools” folder in Android SDK and launch the Dalvik Debug Monitor Service by double-clicking the batch file titled “ddms”.
- In the Dalvik Debug Monitor Service window you will see your Android device listed on. At the Log setion in the bottom of DDMS, you will find many errors being displayed by the debugger. Ignore them.
- Under the “Device” menu, click “Screen Capture” or use CTRL+S as a shortcut to get your Android screenshot.


No comments:
Post a Comment